 Pavilion Arc
Getting started · Rental fleet operations
FleetX
Every asset. Every hire. Accounted for.
FleetX helps an equipment hire company know which machine is free, who has it, when it comes back and when it needs a service.
How the work flows
Every task in FleetX moves through the same stages.
- 1Register
- 2Inspect
- 3Book
- 4Dispatch
- 5Return
Before you begin
Open FleetX, press Open workspace, and keep this page open beside it.
- A computer or phoneAny up-to-date browser works.
- The sample filesAn equipment list and an inspection certificate.
- About 12 minutesAll machines and customers are made up.
Step by step
Follow the steps in order. Each one sets up the next. Select a screenshot to see it full size.
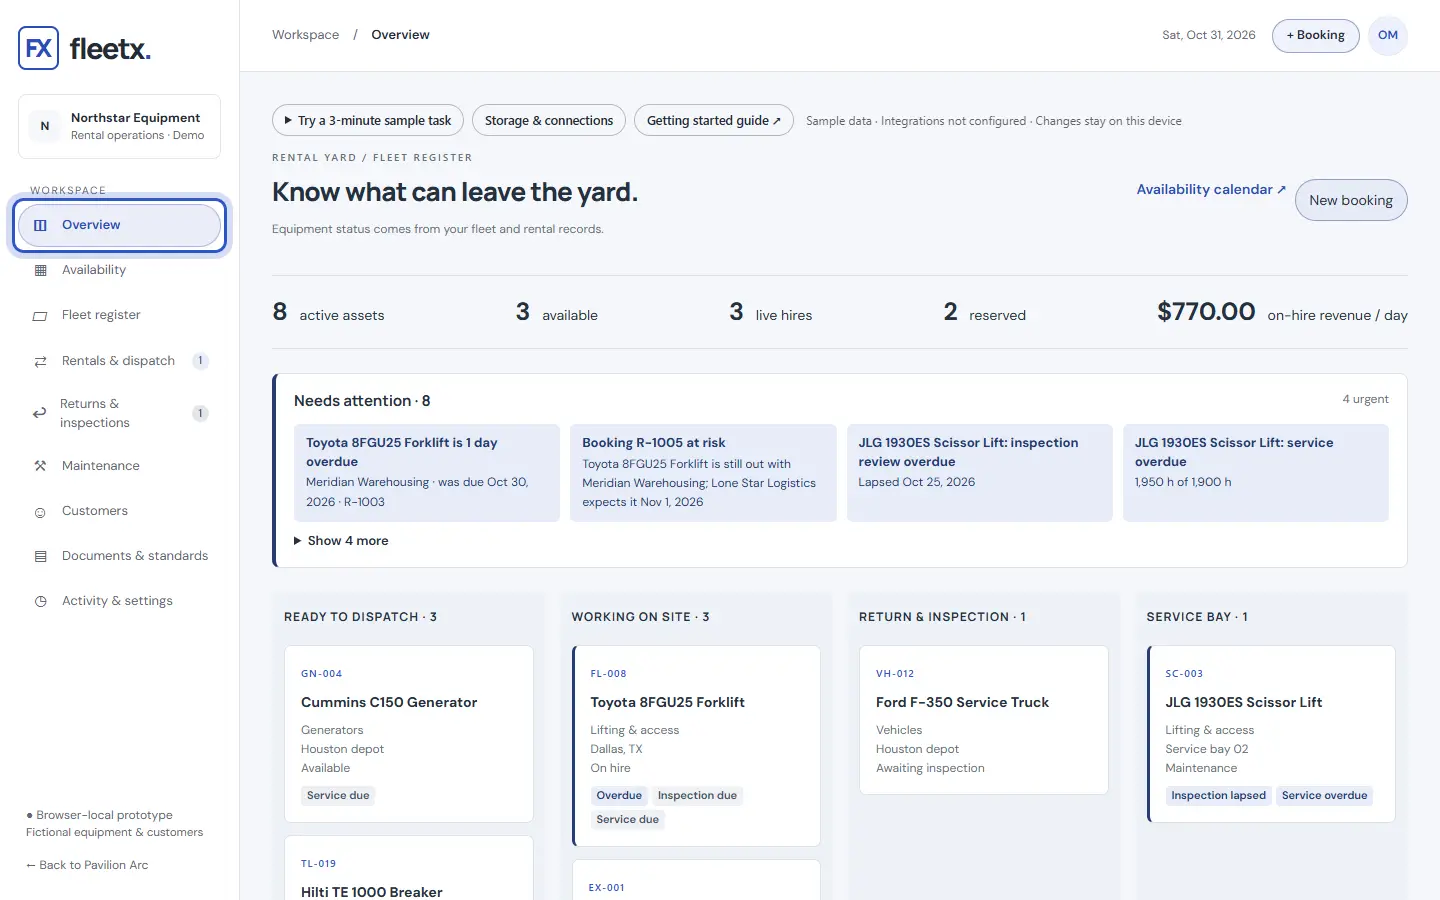
Step 1: Know what can leave the yard
Overview groups your machines: ready to dispatch, working on site, waiting for return inspection and in the service bay.
The ring shows where to look or what to press. Step 2: Import machines
Open Activity & settings, press Import CSV and choose
01_fleetx-equipment-import.csv. Six machines arrive marked Awaiting inspection.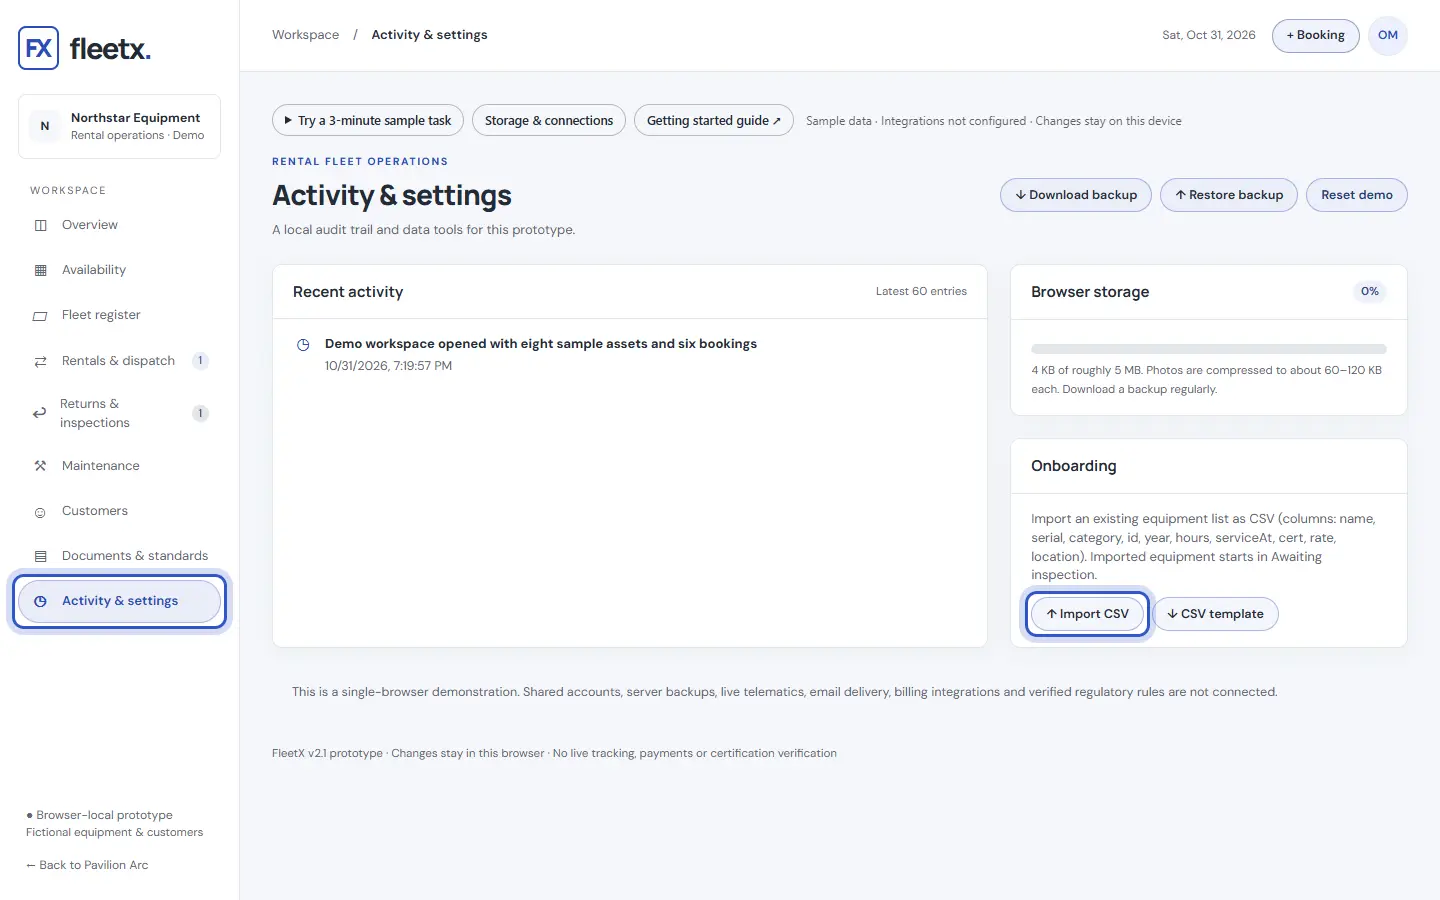
The ring shows where to look or what to press. Step 3: Inspect on arrival
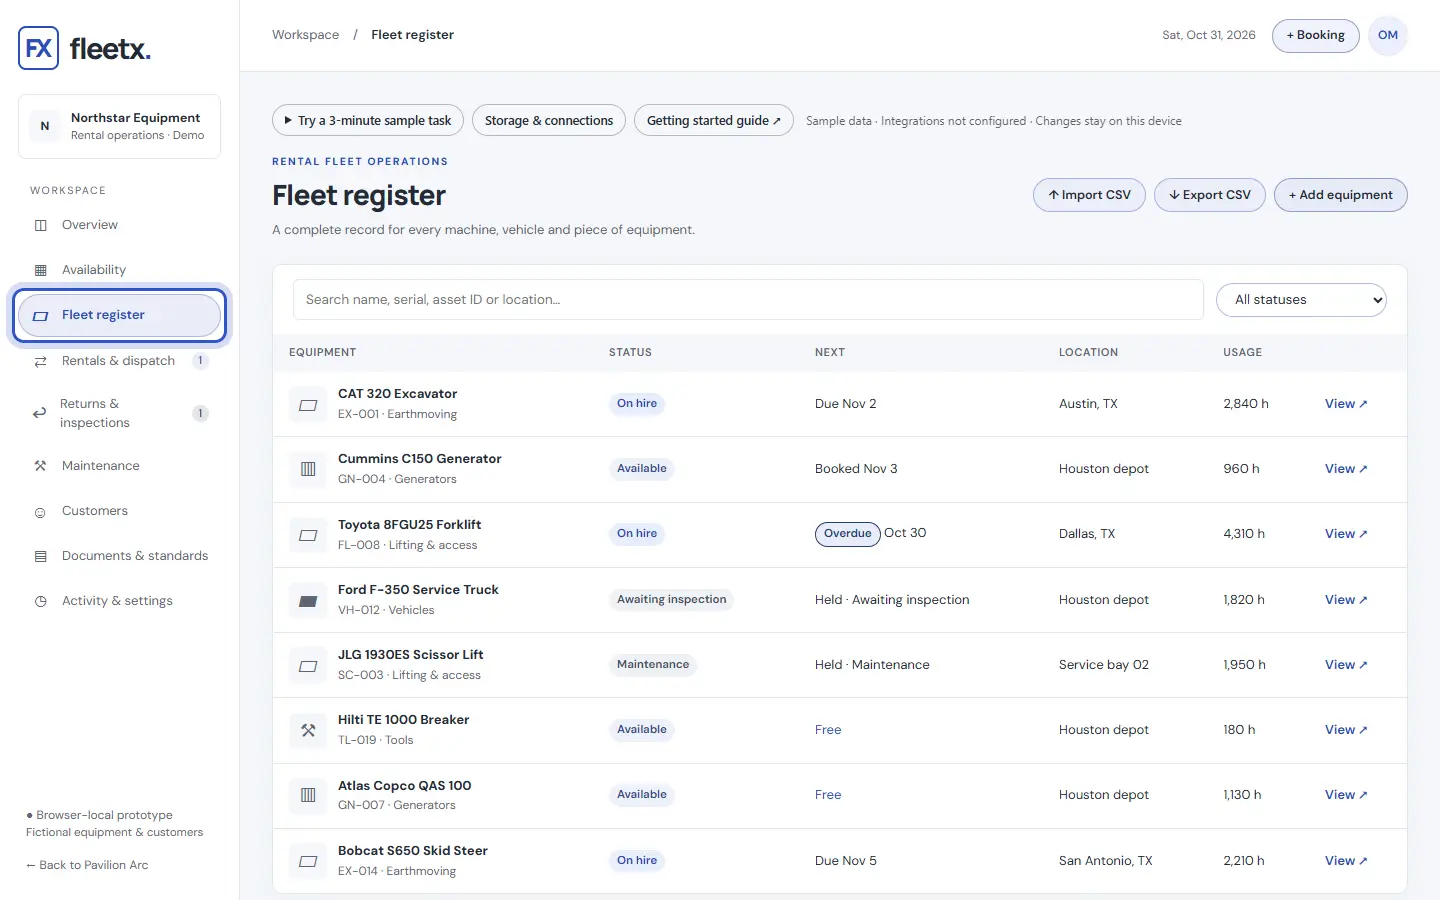
Open Fleet register and choose Compact Track Loader 2T. Press Upload document to add the sample certificate, then Arrival inspection: tick both checks and write what you found. The machine becomes Available.
The ring shows where to look or what to press. Step 4: Book it
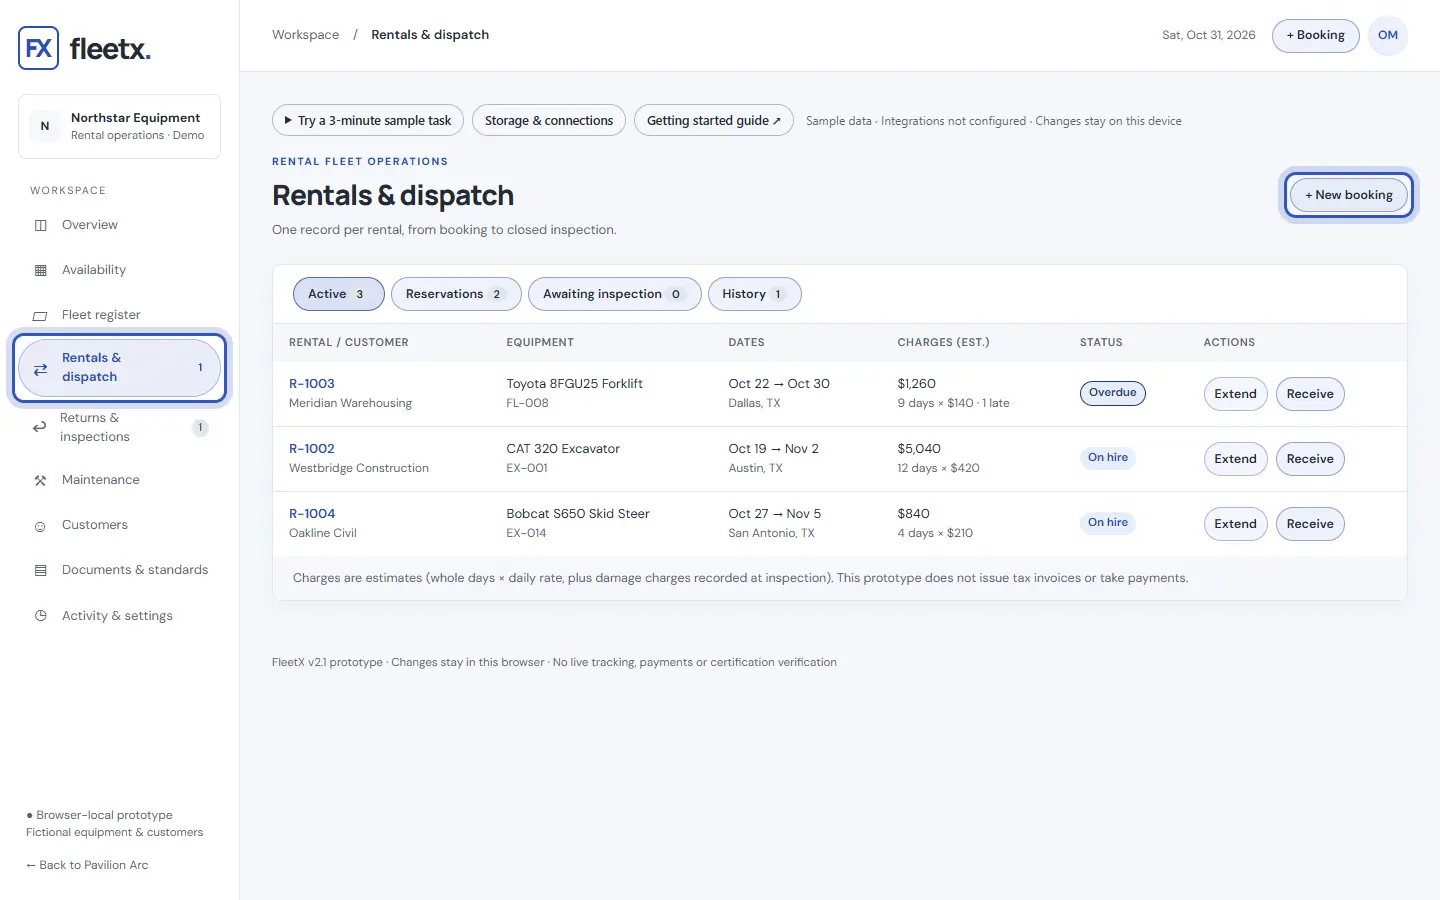
Open Rentals & dispatch and press + New booking.
The ring shows where to look or what to press. Step 5: Add more machines
Fill in the customer, site and dates. Press + Add another item to put a second machine on the same booking. If a machine is already booked for those dates, FleetX warns you before you save.
After saving, open the booking and press Print booking summary for a page the customer can sign.
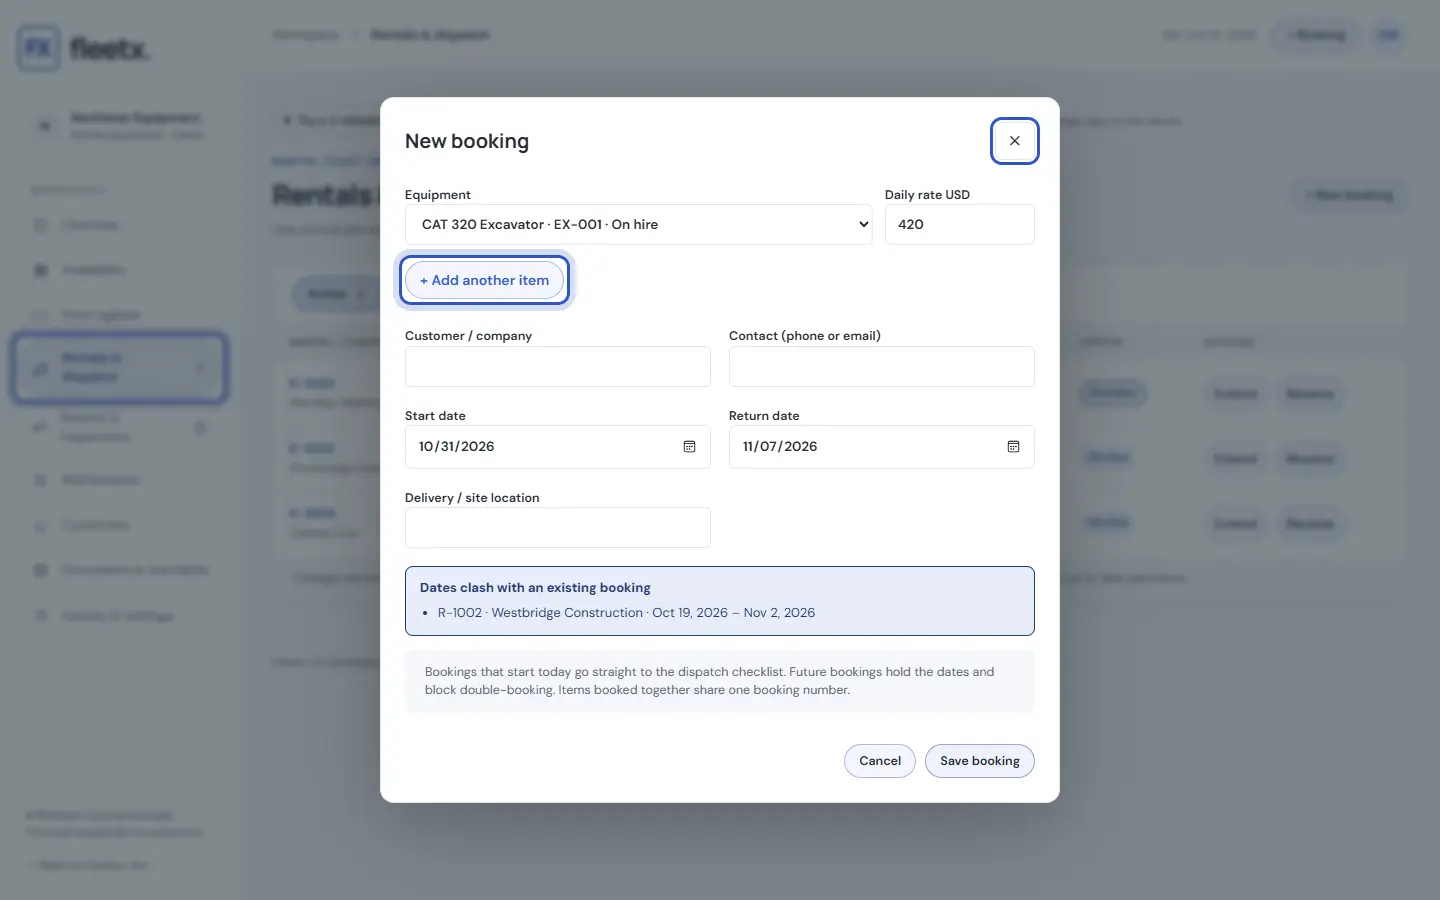
The ring shows where to look or what to press. Step 6: Dispatch and take it back
Follow the booking through Dispatch & handover, Receive return and Return inspection. The rental record keeps every step.
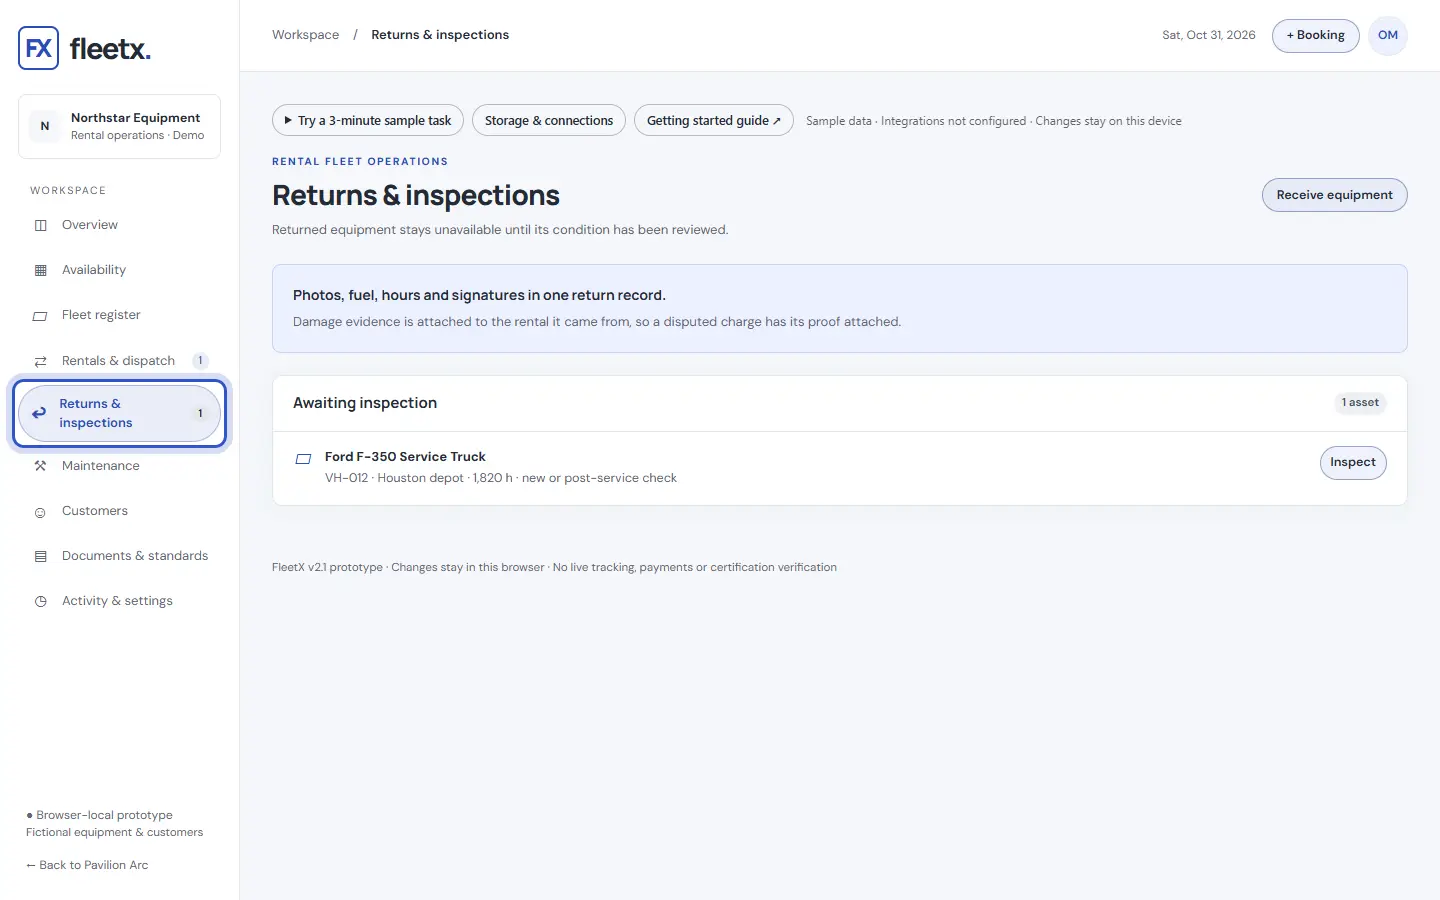
The ring shows where to look or what to press.
What to notice
Double bookings are caught before you confirm, and every machine’s history stays in one place.
Other guides
The same steps-and-screenshots format for every Pavilion Arc product.